



Why Walkway Concrete Pavers Are the Smart Choice for Your Home’s Curb Appeal
Walkway concrete pavers are one of the most popular ways to upgrade a home’s entrance — and for good reason. They’re durable, low-maintenance, and available in dozens of styles that complement almost any home exterior.
Here’s a quick overview of what you need to know:
How to lay walkway concrete pavers (professional process):
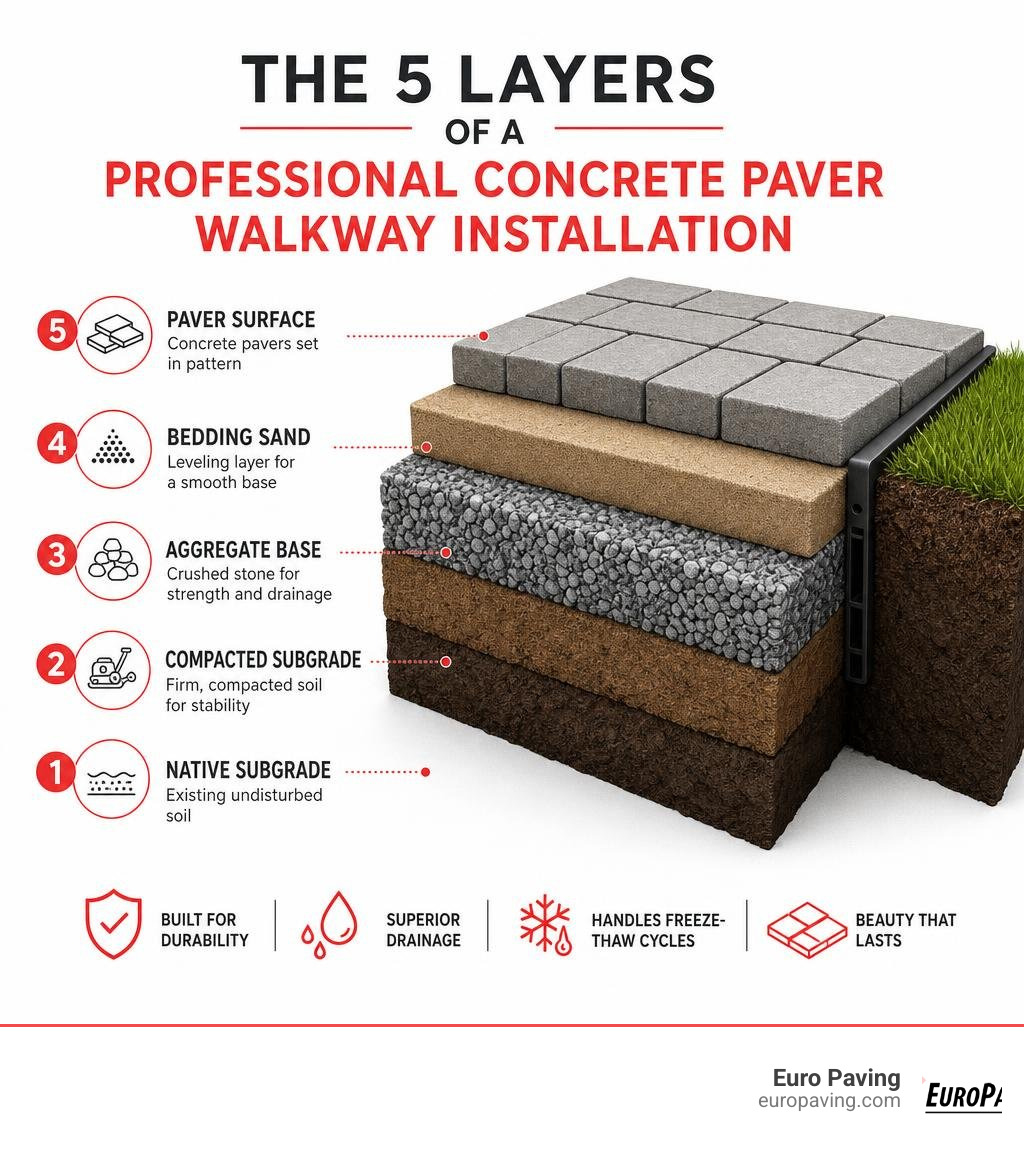
- Excavate the area to roughly 5–6 inches deep
- Compact the subgrade and add a gravel base layer
- Screed a 1-inch layer of bedding sand for a level surface
- Lay the pavers in your chosen pattern, cutting edges as needed
- Install edge restraints along the perimeter
- Sweep polymeric sand into the joints and activate with water
Concrete pavers used in walkways are manufactured units — typically made from Portland cement, aggregates, and pigments — pressed under high pressure into uniform shapes. Unlike poured concrete slabs, they’re installed as individual pieces over a compacted base, which means they can flex slightly with ground movement instead of cracking.
They’re used in over 70% of residential hardscape projects in the U.S., and major retailers like Lowe’s and Home Depot carry hundreds of options ranging from budget-friendly $1–$2 units to premium large-format pavers at $5+ per square foot.
But choosing and installing them correctly makes all the difference — especially in the Chicago area, where freeze-thaw cycles put serious stress on any hardscape surface.
This guide walks you through every step of the process, from picking the right paver to locking it all in with polymeric sand.
Explore more about walkway concrete pavers:
Understanding Walkway Concrete Pavers and Material Options
When designing a new walkway for your home, selecting the right material is the foundation of long-term durability and aesthetic success. While poured concrete and asphalt are common, custom hardscaping materials offer far superior visual appeal and physical resilience.
To help you make an informed decision for your front entrance or backyard path, let’s look at how walkway concrete pavers stack up against other popular materials like natural stone, clay brick, and outdoor porcelain.
| Material | Durability | Maintenance Level | Weather Resistance (Chicago Freeze-Thaw) | Design & Color Variety | Relative Cost |
|---|---|---|---|---|---|
| Concrete Pavers | High (flexible units resist cracking) | Low (easy individual replacement) | Excellent (when properly sealed) | Extremely High (unlimited shapes/colors) | Moderate |
| Natural Stone | High to Very High | Low to Moderate | Good (varies by stone type) | High (organic, unique variations) | High to Very High |
| Clay Brick | Moderate to High | Low | Moderate (can flake over time) | Limited (mostly classic reds/browns) | Moderate to High |
| Porcelain Pavers | Very High | Extremely Low | Excellent (non-porous) | High (modern, wood-look, stone-look) | High |
Concrete Pavers vs. Other Materials
- Concrete Pavers: Engineered for strength, concrete pavers are compacted under immense pressure during manufacturing. This makes them highly dense and resistant to water absorption. Because they are modular, they flex with the shifting soil during our harsh winter freeze-thaw cycles.
- Natural Stone: Materials like bluestone, flagstone, and limestone offer unmatched organic beauty. However, they can be highly irregular in thickness, making them more challenging to install evenly. You can read more about alternative stone options in our guide to The Best Paving Stones for a Sidewalk That Lasts.
- Clay Brick: Traditional clay bricks offer a timeless, historic look. While beautiful, clay is more porous than modern concrete pavers, making it susceptible to chipping or flaking (spalling) under heavy frost. For those who love the classic aesthetic, we often recommend high-quality concrete pavers designed to mimic brick, or you can explore Stunning Brick Paver Walkway Designs for Your Home to see how we blend traditional looks with modern durability.
- Porcelain Pavers: An emerging trend in premium outdoor design, 2cm porcelain pavers are completely non-porous, slip-resistant, and frost-proof. They are highly favored for ultra-modern designs but require specialized thin-set mortar or pedestal installation systems.
If you are considering a classic brick look, check out our insights on Brick Paving Sidewalks to see how they can elevate your property’s exterior.
Planning and Preparing for Your Walkway Project
A beautiful walkway is only as good as the preparation beneath it. Skipping steps in the planning and excavation phases will inevitably lead to sagging pavers, shifting edges, and standing water.
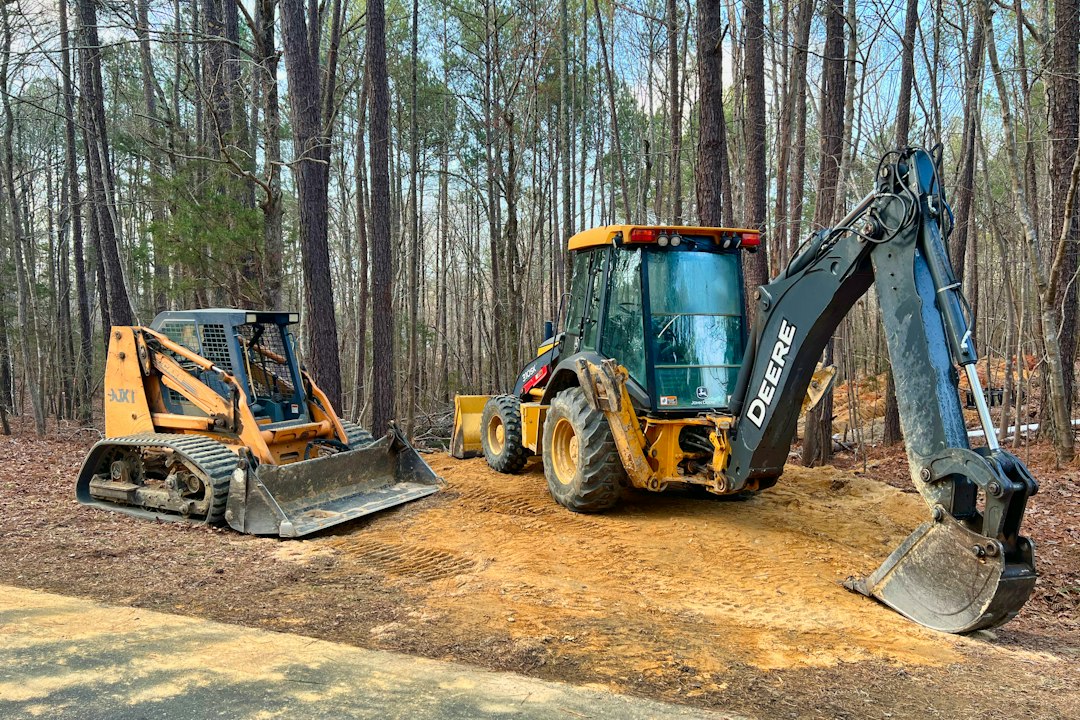
Before picking up a shovel, we must carefully plan the layout, drainage, and slope of the walkway.
- Excavation Depth: A standard pedestrian walkway requires an excavation depth of approximately 5 to 6 inches. This accounts for 3 to 4 inches of compacted gravel base, 1 inch of bedding sand, and the thickness of the paver itself (usually around 2 to 2-3/8 inches).
- Soil Compaction: The native subgrade (the soil at the bottom of your excavation) must be thoroughly compacted using a heavy plate compactor. Uncompacted soil will settle over time, taking your beautiful new walkway down with it.
- Drainage and Slope: To prevent water from pooling on your walkway or draining toward your home’s foundation, the path must have a minimum slope of 1/4 inch per linear foot away from any structures.
For a detailed look at how professionals handle the physical layout and excavation process, you can refer to the classic steps outlined by How to Build a Concrete Paver Walkway – This Old House . If you are looking for budget-conscious layout ideas before starting, check out our guide on Chic and Cheap Walkway Designs for Your Front Yard.
Selecting the Right Walkway Concrete Pavers for Your Climate
In the Chicagoland area—including communities like Lake Forest, Arlington Heights, and Hinsdale—our hardscapes face extreme weather. From scorching summer heat to sub-zero winter temperatures, the ground is constantly moving.
To ensure your walkway stands the test of time, keep these factors in mind:
- Freeze-Thaw Resistance: Standard poured concrete slabs crack because they cannot handle the pressure of freezing groundwater. Interlocking concrete pavers solve this by distributing the movement across hundreds of flexible joints.
- Slip Resistance: Walkways get wet, icy, and snowy. Choose pavers with a textured or aggregate-faced surface rather than an ultra-smooth finish to ensure safe foot traffic year-round.
- Brand Quality (Unilock): As a premier contractor, we highly recommend Unilock products. Unilock pavers are engineered with advanced technologies that resist de-icing salts, prevent fading from UV rays, and offer industry-leading compressive strength.
Choosing the right product is essential. For more details on selecting materials that survive local winters, read our article on The Best Paving Stones for a Sidewalk That Lasts.
Essential Materials and Tools for Walkway Concrete Pavers
To execute a professional-grade installation, you need the right materials and specialized tools. Here is your checklist:
- Gravel Base (CA-6 or crushed road stone): This is the structural backbone of your walkway. It provides strength and allows water to drain away from the pavers.
- Bedding Sand (Torpedos/washed concrete sand): A 1-inch layer of coarse sand is used to bed the pavers. Do not use fine play sand, as it will wash away over time.
- Edge Restraints: Heavy-duty plastic or aluminum edging secured with steel spikes keeps the perimeter pavers from spreading outward.
- Polymeric Sand: A specialized sand mixed with dry polymers. Once swept into the joints and misted with water, it hardens to lock the pavers in place and prevent weed growth.
- Geotextile Fabric: Laying a professional-grade geotextile fabric between the clay subgrade soil and the gravel base prevents the stone from sinking into the clay while allowing water to pass through.
For a deeper dive into the exact tools required, view our Step-by-Step Guide to Laying a Stone Paver Sidewalk.
The Professional Step-by-Step Installation Process
Laying walkway concrete pavers is a highly structured, physical process. While the concept is simple, the execution requires precision at every stage.
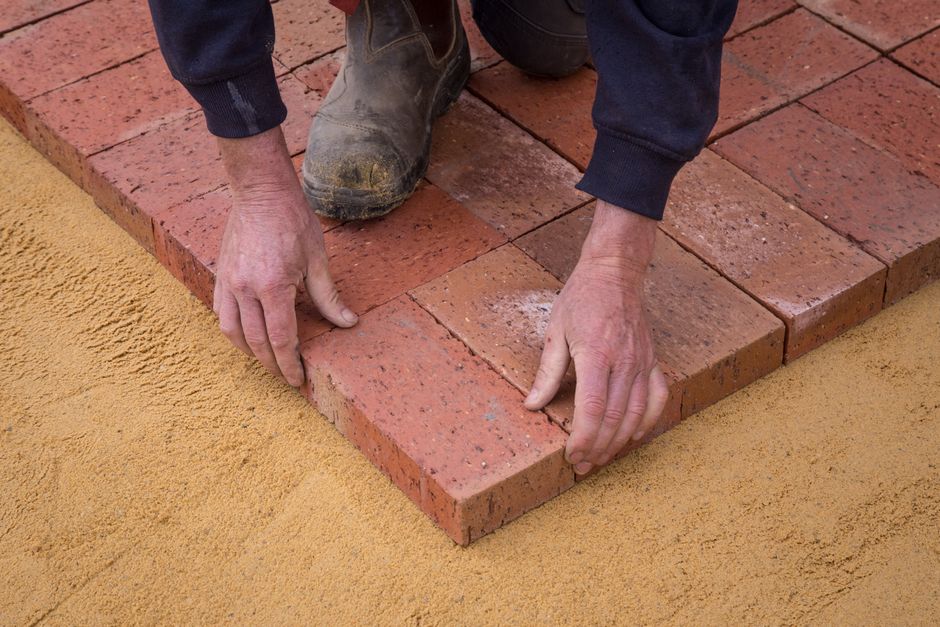
Step 1: Excavation and Base Compaction
The first step is clearing the pathway area of all grass, roots, and old pavement. We excavate down to the required depth based on the soil conditions.
In the Chicagoland area, we frequently encounter heavy clay soil. Clay retains water, making it highly prone to frost heaving. To combat this, we excavate slightly deeper to allow for a thicker gravel base (up to 6 inches for residential walkways).
Once the soil is excavated, we run a commercial-grade vibratory plate compactor over the subgrade. Next, we lay down geotextile fabric and begin adding our CA-6 crushed gravel base in 2-inch layers (lifts). Compacting the gravel in thin layers ensures maximum density and eliminates any air pockets.
Step 2: Laying the Bedding Sand
With the gravel base perfectly sloped and compacted, it is time to install the bedding sand.
We place 1-inch outside-diameter steel screed pipes across the base. We then dump washed concrete sand over the area and use a straight board (screed board) pulled across the pipes to strike the sand perfectly flat. Once the sand is leveled, we carefully remove the pipes and fill in the remaining voids with a trowel.
Crucial rule: Never walk on or compact the bedding sand once it has been screeded. It must remain loose so the pavers can be bedded into it during the final compaction.
Step 3: Placing the Pavers and Cutting Edges
Now comes the creative part: laying the concrete pavers.
We start from a straight edge or a permanent structure (like a porch or driveway) and work our way outward. We use spacer tabs on the sides of the pavers to maintain consistent joint widths.
- Choosing a Pattern: For high-traffic walkways, patterns like a Herringbone or a classic Running Bond offer the best interlocking strength. For modern homes, large-format square or rectangular pavers laid in a clean, stacked pattern are highly popular.
- Making Cuts: Almost every walkway requires custom cuts at the edges or curves. We use a professional wet saw equipped with a diamond-tipped blade to ensure clean, chip-free cuts.
To gather design inspiration for modern layouts, check out The Ultimate Guide to Large Sidewalk Pavers Design and Inspiration or read our tips on selecting the right path layout in Get Your Path Straight with These Top-Rated Large Walkway Pavers.
Step 4: Installing Edge Restraints and Polymeric Sand
Once all the pavers are laid and cut, we install heavy-duty edge restraints along the open perimeter. These restraints are secured deep into the gravel base using 10-inch steel spikes spaced every 12 inches.
Next, we sweep polymeric sand across the dry walkway, filling the joints completely. We run a plate compactor (fitted with a protective polyurethane pad to prevent scratching the pavers) over the surface. This vibrates the sand deep into the joints and beds the pavers into the underlying sand layer.
Finally, we sweep off all excess surface sand and mist the walkway with water. This activates the polymers in the sand, causing it to harden into a flexible, rubber-like barrier that locks the pavers together.
Overcoming Common Installation Mistakes and Maintenance Tips
Even a professionally installed walkway requires occasional maintenance to preserve its beauty and structural integrity.
By understanding common pitfalls and following a basic care schedule, you can protect your investment for decades.
How to Prevent Shifting and Weed Growth
The two most common complaints about older paver walkways are shifting stones and weed growth in the joints.
- The Truth About Weeds: Weeds do not actually grow up from the soil beneath the pavers (especially if a proper gravel and sand base was installed). Instead, windblown weed seeds land in loose, dirty joint sand and take root from the surface.
- The Polymeric Sand Solution: Keeping your joints filled with high-quality polymeric sand is your best defense. If you notice the sand washing out or eroding after several years of heavy rains, clean out the joints and apply a fresh layer of polymeric jointing sand.
- Preventing Shifting: Shifting is almost always caused by a failure of the edge restraints. Ensure your edging spikes remain driven deep into the gravel base, and inspect the perimeter annually.
If you are looking for creative ways to design walkways that naturally resist weed encroachment, check out our Sidewalk Paving Ideas That Will Make Your Neighbors Jealous.
Cleaning and Sealing Concrete Pavers
To keep your walkway concrete pavers looking as vibrant as the day they were installed, we recommend a simple cleaning and sealing routine:
- Regular Sweeping and Rinsing: Keep leaves, dirt, and organic debris off the walkway to prevent organic staining.
- Stain Removal: If oil, grease, or rust stains occur, use specialized paver cleaners rather than harsh household chemicals, which can etch the concrete surface.
- Applying a Penetrating Sealer: We highly recommend applying a premium joint-stabilizing sealer every 3 to 5 years. This sealer protects the concrete from oil penetration, enhances its natural color, and binds the joint sand to prevent washout and weed growth.
Frequently Asked Questions About Walkway Concrete Pavers
Can you lay concrete pavers over an existing concrete walkway?
Yes, you can install overlay pavers over an existing concrete walkway, but only if the concrete is structurally sound, flat, and free of major settling or deep cracks.
To do this professionally, you must first drill drainage holes through the low points of the existing concrete slab to prevent water from trapping under the pavers. Next, lay a thin 1-inch layer of bedding sand, install the pavers, and secure the perimeter pavers using a high-strength concrete adhesive or mortar rather than plastic spikes. If the existing concrete is heavily cracked or crumbling, it must be completely removed and replaced with a traditional gravel base.
How long do concrete walkway pavers last?
When properly manufactured and professionally installed, high-quality concrete pavers have an incredible lifespan of 30 to 40 years or more.
Because they are manufactured using high-pressure compaction, they are significantly stronger and less porous than standard poured concrete. This high density prevents water from entering the stone and causing internal damage during freezing weather. To learn more about how heavy-duty concrete units perform in demanding pedestrian environments, read about Commercial Concrete Pavers | Walkway & Plaza Applications .
Why should I hire a professional contractor instead of doing it myself?
While laying a few stepping stones is a manageable weekend project, installing a complete, interlocking concrete paver walkway is highly labor-intensive and requires specialized equipment.
- Chicagoland Freeze-Thaw: Local soil and weather conditions are incredibly unforgiving. A professional contractor understands the exact excavation depths, base materials, and pitching requirements needed to prevent shifting and pooling.
- Heavy Equipment: Moving tons of gravel, sand, and concrete units requires commercial-grade excavators, haulers, and high-power plate compactors that DIYers simply cannot access.
- Warranty and Peace of Mind: Professional installations by a Unilock Authorized Contractor come with structural guarantees, giving you peace of mind that your investment will remain beautiful and level for decades.
For guidance on finding a certified, highly rated local team, read our guide on Finding the Best Sidewalk Paving Contractors in Your Area. You can also compare residential and industrial solutions in Don’t Get Stepped On: Commercial and Residential Sidewalk Paving Solutions.
Conclusion
A professionally designed and installed concrete paver walkway is one of the best investments you can make in your home’s curb appeal and long-term value. By selecting premium materials, preparing a rock-solid base, and executing a precise installation, you create an inviting entrance that will welcome guests to your home for decades to come.
As a Unilock Authorized Contractor, Euro Paving specializes in transforming ordinary front yards and backyards into stunning, family-friendly outdoor living spaces. We bring over two decades of professional hardscaping experience to homeowners throughout Cook and DuPage Counties, including Chicago, Elmhurst, Hinsdale, Norridge, and Arlington Heights.
Ready to elevate your home’s exterior with a beautiful, durable new walkway? Transform your home with professional sidewalk paving and schedule your custom design consultation with our expert team today!