



Why Getting Pavers Next to a Concrete Walkway Right Matters More Than You Think
Installing pavers next to a concrete walkway is one of the most popular hardscaping upgrades for Chicago-area homeowners — and one of the most commonly done wrong.
Done right, the combination looks stunning and adds real value to your home. Research shows well-designed landscapes can increase property values by up to 28%. Done wrong, you end up with tripping hazards, washout, and pavers that sink or shift after the first winter.
Here is a quick overview of what a successful paver-to-concrete installation requires:
- Excavate properly — dig 6–10 inches deep to allow for gravel base, bedding sand, and paver thickness
- Compact in layers — build your gravel base in lifts, compacting thoroughly between each one
- Use geotextile fabric — run it under the gravel and up the side of the existing concrete slab to prevent washout
- Set the right height — install pavers approximately 1/4 inch higher than the concrete before compaction, so they settle flush
- Lock the transition — use edge restraints and polymeric sand to prevent lateral shifting and joint erosion
- Plan for drainage — grade the paver surface 1–2% away from the home to avoid water pooling at the joint
The sections below walk through every step in detail — from base prep to edging options to what happens when you install pavers over concrete instead of beside it.
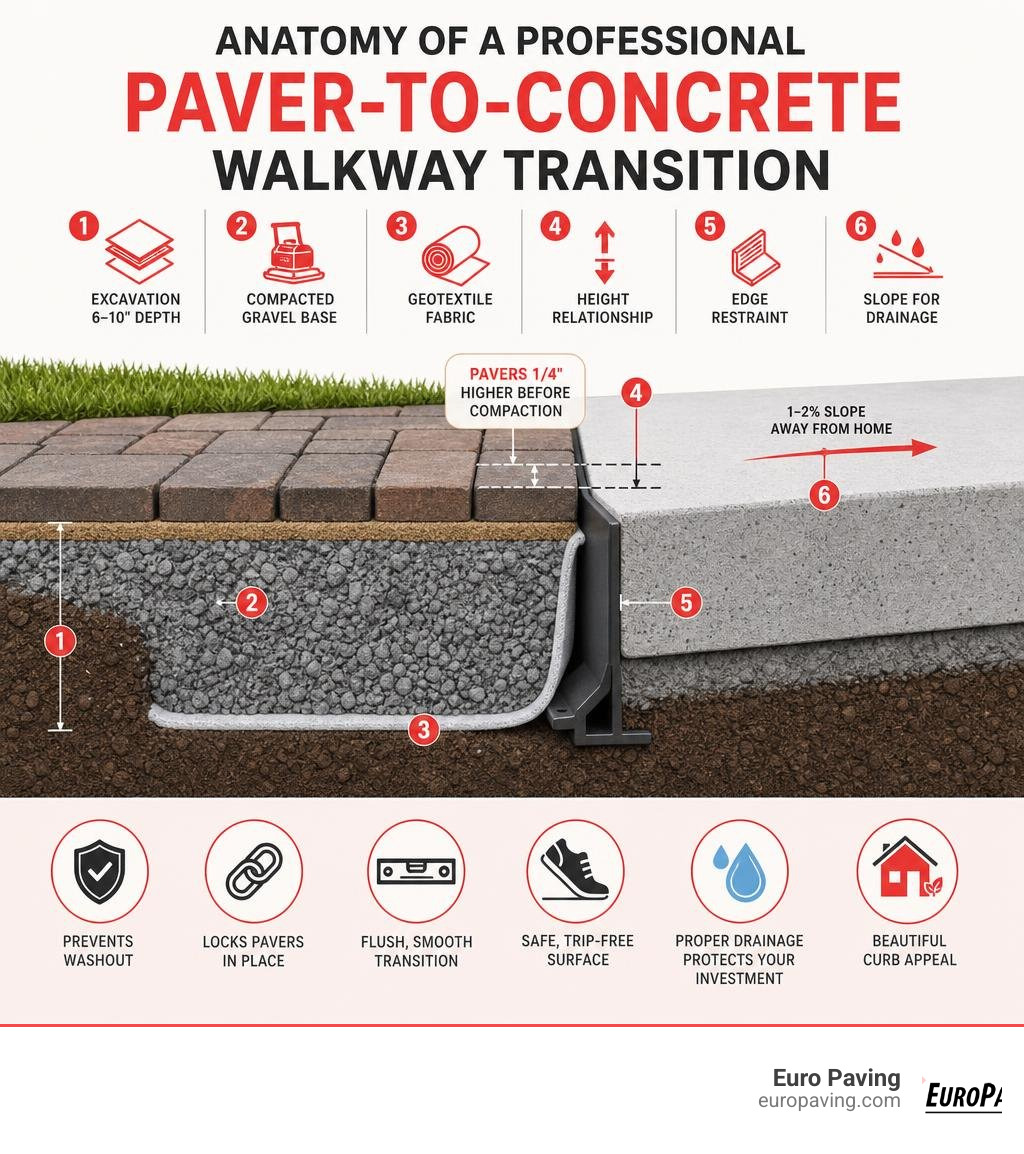
Know your pavers next to concrete walkway terms:
Best Practices for Installing Pavers Next to Concrete Walkway
Achieving a seamless transition when installing pavers next to concrete walkway spaces requires meticulous ground preparation. Poured concrete walkways possess a rigid, monolithic structure, whereas paver systems are flexible pavements designed to distribute weight across individual units. Because these two systems behave differently under load and temperature swings, the interface between them is highly vulnerable to shifting, settling, and subgrade erosion.
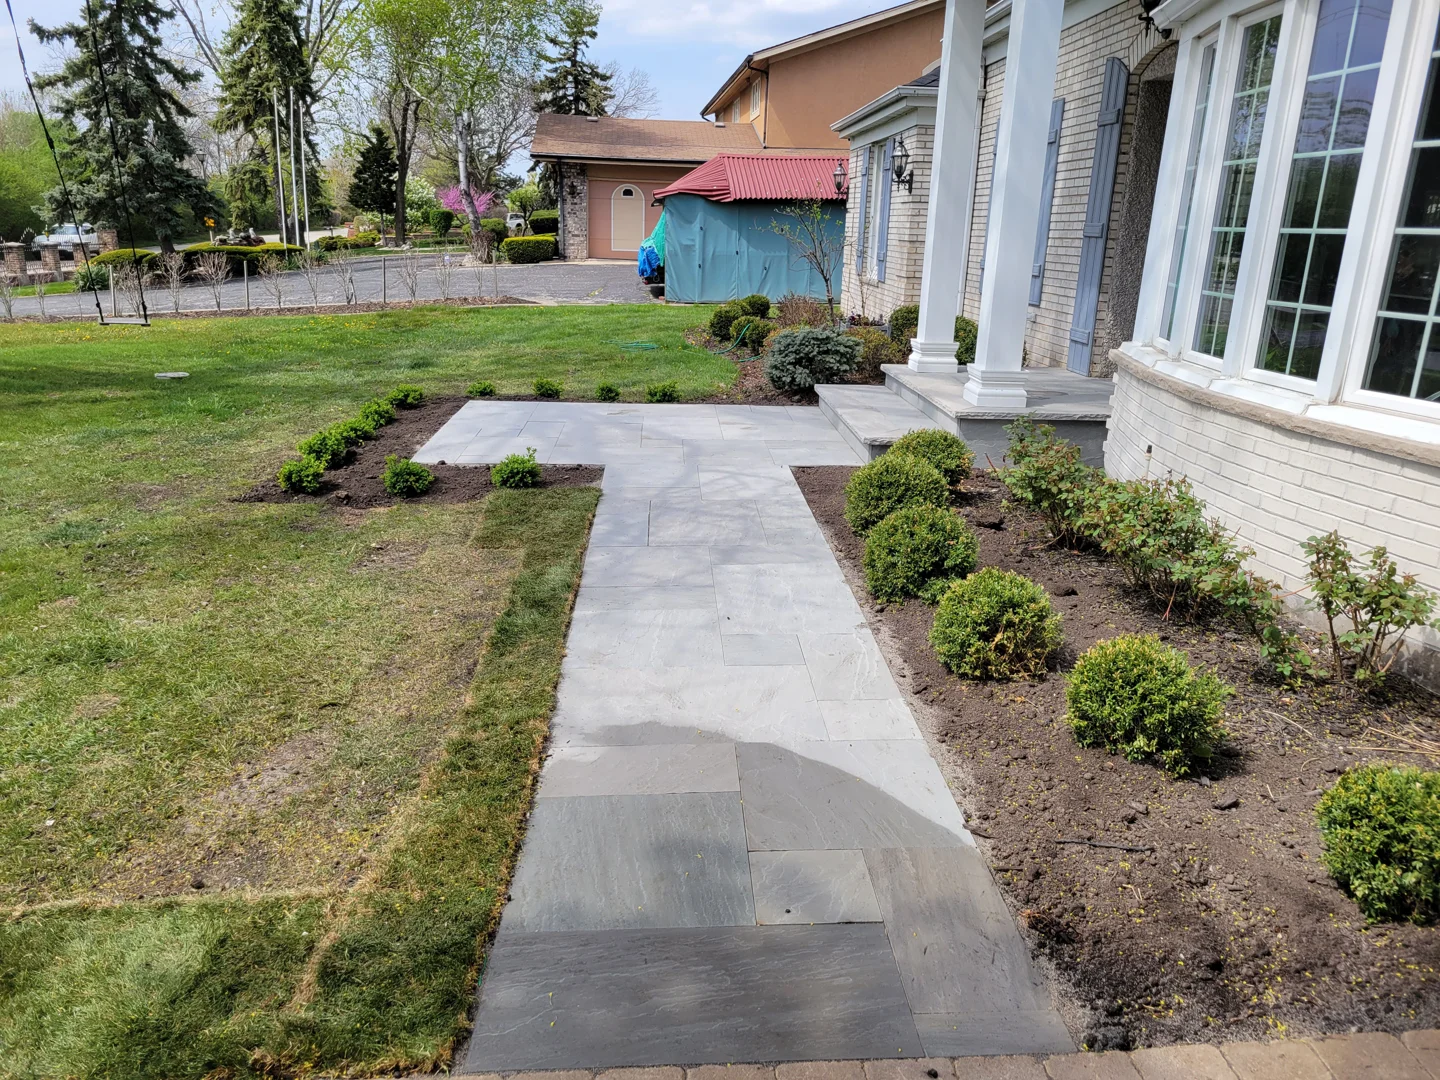
To prevent the pavers from sinking below or rising above the concrete slab, a deep, stable foundation is non-negotiable.
1. Excavation and Subgrade Stabilization
The excavation depth must account for the thickness of the paving stone, a 1-inch bedding sand layer, and a minimum of 4 to 6 inches of compacted aggregate base. In suburban Chicago communities like Hinsdale, IL and Highland Park, heavy clay soils require deeper excavation—often up to 8 to 10 inches—to guarantee structural integrity. Once excavated, the native soil subgrade must be thoroughly compacted using a heavy-duty mechanical plate compactor.
2. Geotextile Fabric Placement
Before placing any aggregate, we lay a high-quality woven geotextile fabric over the compacted soil. This fabric acts as a separation barrier, preventing the clay subgrade from mixing with the clean gravel base. Crucially, the geotextile must run completely under the excavation area and extend vertically up the side of the existing concrete walkway. This vertical wrap seals the junction, preventing the bedding sand and fine aggregate from migrating into any voids that may exist beneath the poured concrete slab.
3. Aggregate Base Compaction
The base material—typically a 3/4-inch crushed road run or dense-graded aggregate—must be installed in “lifts” or layers no thicker than 2 to 3 inches at a time. Each lift must be lightly sprayed with water and compacted with a plate compactor until it is completely stable. Special attention must be paid to the area directly adjacent to the concrete walkway. Concrete contractors often do not compact the soil beneath the edges of their slabs as thoroughly as paver installers do, leaving hidden voids. Running the compactor tightly against the concrete edge ensures these voids are consolidated before the bedding sand is screeded.
Selecting high-quality materials for this process is essential. For more detailed insights on choosing materials that resist wear and tear, read our guide on The Best Paving Stones for a Sidewalk That Lasts.
Managing Height and Settling of Pavers Next to Concrete Walkway
One of the most common hardscaping errors is installing the pavers perfectly flush with the concrete walkway before compaction. Because the bedding sand layer compresses during the final consolidation process, pavers set flush initially will eventually sink, creating an unsightly and dangerous tripping hazard.
To account for this natural compaction settling, the pavers must be set approximately 1/4 inch higher than the adjacent concrete slab before the plate compactor is run over them.
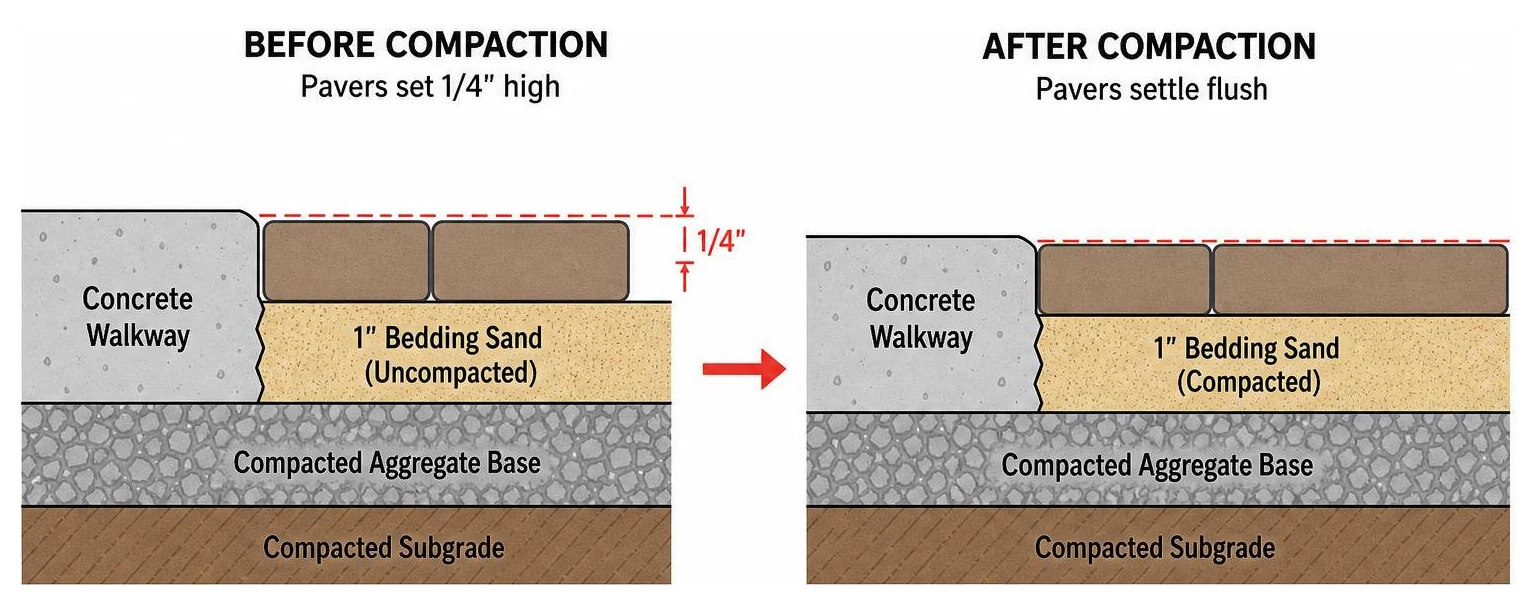
The exact base depth calculation depends on your selected materials. For example, if you are using premium Unilock pavers that are 2 3/8 inches (60mm) thick:
- Bedding sand layer: 1 inch (uncompacted)
- Paver thickness: 2 3/8 inches
- Total depth above the compacted aggregate base: 3 3/8 inches
To achieve a finished height that is exactly flush with the concrete, the compacted gravel base must measure exactly 3 1/8 inches below the surface of the concrete walkway. When the pavers are laid on the uncompacted sand, they will sit 1/4 inch high. After sweeping joint sand into the gaps and running a plate compactor equipped with a protective neoprene mat over the surface, the pavers will be forced down into the bedding sand, locking together perfectly level with the concrete walkway.
For more information on standard industry specifications for concrete and paver combinations, refer to the Sidewalk Pavers – Concrete Paver Walkway – Concrete Network .
Transition and Edging Options for Pavers Next to Concrete Walkway
Without proper lateral restraint, pavers installed next to a concrete walkway will spread outward over time, widening the joints and causing individual stones to shift. To maintain the alignment and structural integrity of the transition, we employ robust edge restraints and advanced jointing materials.
Where the pavers run parallel to or terminate at the concrete walkway, the concrete slab itself can act as a natural edge restraint. However, the joint between the two materials must be sealed to prevent water infiltration and joint washout. We utilize a high-performance, commercial-grade polymeric sand to fill the joints. Polymeric sand contains specialized polymers that activate when misted with water, hardening to act as a flexible glue. This locks the pavers in place, deters weed growth, and prevents the bedding sand from washing out into the surrounding soil.
For borders that extend beyond the concrete slab, heavy-duty snap-edge plastic or metal restraints are anchored into the compacted gravel base with 10-inch steel spikes. This dual-containment system ensures that whether your walkway curves gracefully through an Arlington Heights lawn or frames an outdoor kitchen in Downers Grove, the borders remain completely straight and stable.
Explore creative layout ideas and visual transitions by reviewing our Sidewalk Paving Ideas That Will Make Your Neighbors Jealous.
Laying Pavers Over Concrete vs. Installing Them Adjacent
When updating your home’s curb appeal, you may face a choice: should you excavate and install a new paver walkway directly adjacent to your existing concrete, or can you save time by overlaying pavers directly on top of the old concrete?
Both methods are highly effective, but they serve different structural and aesthetic purposes.
| Feature | Overlay Installation (Pavers Over Concrete) | Adjacent Installation (Pavers Next to Concrete) |
|---|---|---|
| Primary Benefit | Eliminates excavation costs; fast installation | Perfect for expanding walkways or driveways |
| Required Base | Existing concrete must be structurally sound and crack-free | Compacted crushed gravel (4-6 inches) |
| Bedding Layer | 1-inch sand, bituminous, or latex-modified mortar | 1-inch clean concrete sand or chip stone |
| Height Impact | Raises overall elevation by 3–4 inches | Matches existing concrete height perfectly |
| Drainage Needs | Requires weep holes drilled in concrete base | Natural drainage through subgrade and slope |
If you choose to overlay pavers on top of an existing concrete walkway, the concrete must be in excellent structural condition. Minor hairline cracks can be bridged by laying a heavy-duty landscaping fabric over the concrete before applying a 3/4-inch to 1-inch layer of fine leveling sand.
For homeowners interested in learning more about the step-by-step process of overlaying cracked or aging pathways, the DIY: How To Install Pavers Over Old Concrete | Beginning in the Middle offers an excellent look at how a budget-friendly overlay can transform a space. Additionally, you can find professional design inspiration and material recommendations in our article on Covering Concrete Sidewalk with Pavers for a Fresh Look.
Drainage, Grading, and Accessibility Considerations
Improper drainage is responsible for more than 50% of all hardscaping failures. When combining a rigid concrete walkway with a flexible paver system, managing water runoff is critical to prevent erosion beneath the concrete slab and shifting within the paver bed.
1. Grading and Slope
All walkways must be built with a minimum 1% to 2% slope (approximately 1/8 to 1/4 inch of drop per foot) directed away from your home’s foundation and toward a suitable drainage area. If the pavers are graded toward the concrete walkway without an escape route, water will pool at the transition seam, eventually saturating the bedding sand and destabilizing the base.
2. Managing Door Thresholds and Step Transitions
When installing pavers adjacent to or over concrete near entryways, you must carefully calculate the remaining clearance. Adding 3 inches of pavers over an existing concrete porch can block outward-swinging screen doors or violate local building codes regarding step riser heights.
According to ADA standards and standard residential building codes, step risers must maintain a consistent height (typically between 7 and 7 3/4 inches) with no more than a 3/8-inch variation between steps. A sudden height change at a doorway or step transition is not only a code violation but also a severe safety hazard. In premium renovations—such as integrating Unilock Ledgestone steps over a concrete foundation—we adjust the heights of the underlying concrete steps to ensure the finished mortared paver steps are perfectly uniform and safe.
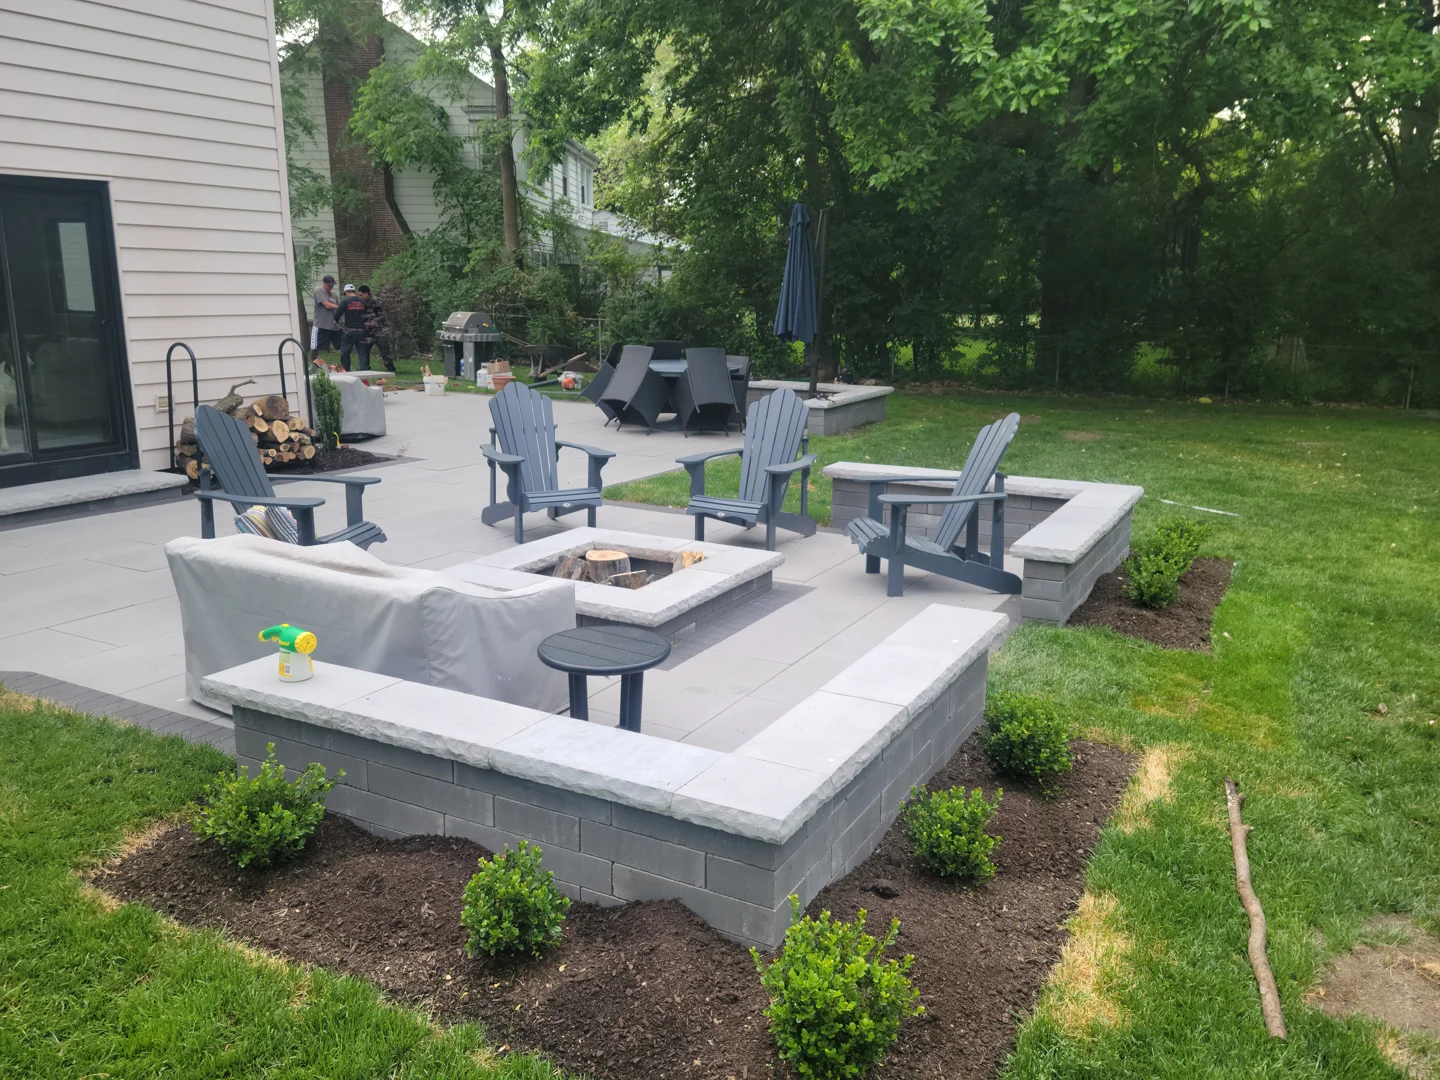
To learn more about designing safe, code-compliant entryways and custom walkways, read our comprehensive guide on Sidewalks and Walkways Design and Build a Beautiful Outdoor Living Space.
Frequently Asked Questions About Paver and Concrete Transitions
Can you butt pavers directly against a concrete edge?
Yes, you can butt pavers directly against a clean, straight concrete edge, but you must take precautions to prevent joint washout and shifting. Because the joint between concrete and pavers is a point of movement, standard sand will quickly wash out. We recommend running a vertical strip of geotextile fabric down the concrete edge before laying the bedding sand, and filling the final joint with high-performance polymeric sand to seal the seam.
What is the best bedding material for pavers next to concrete?
For standard residential walkways, a 1-inch layer of clean, washed concrete sand (ASTM C33) is the industry standard. It provides excellent drainage and allows the pavers to be compacted flat. In areas with severe drainage challenges or heavy rainfall, a clean, open-graded chip stone (such as ASTM No. 8 or No. 89) can be used instead to allow water to pass rapidly into the subgrade.
How do freeze-thaw cycles affect the transition between pavers and concrete?
In the Chicago area, freeze-thaw cycles cause the soil to expand and contract significantly. Because poured concrete slabs do not flex, they are prone to cracking under this pressure. Paver systems, however, are flexible and distribute this movement across individual stones. To prevent the transition joint from buckling, we construct a deep, well-draining gravel base that allows water to drain away before it can freeze and lift the stones.
Conclusion
Integrating pavers next to a concrete walkway is an exceptional way to elevate your home’s curb appeal, expand your outdoor living space, and add lasting value to your property. However, achieving a flawless, flush transition that withstands Chicago’s harsh freeze-thaw cycles requires professional precision, deep excavation, and elite materials.
As an award-winning Unilock Authorized Contractor in Illinois, Euro Paving has spent nearly 20 years transforming ordinary backyards into breathtaking, functional outdoor retreats. Whether you are looking for premium brick patio installation in Chicago, custom outdoor kitchen contractors in the Chicago suburbs, or creative backyard hardscaping ideas like a custom fire pit, our team delivers unmatched craftsmanship.
We take the guesswork out of your next home improvement project by offering state-of-the-art 3D paving design and planning, flexible financing through the Unilock DO-IT-NOW Program, and lifetime-guaranteed materials.
Don’t risk tripping hazards or shifting stones with a subpar installation. Schedule a professional sidewalk paving consultation with the experts at Euro Paving today, and let us build an outdoor oasis your family will enjoy for decades.